Putting a liner on a curtain seems tricky, but it’s straightforward. Liners add elegance and function to any curtain.
They block light, provide insulation, and extend the life of your curtains. Curtain liners come in various types and materials. Some block light completely, while others allow some light through. Adding a liner can make your room feel cozy and private.
It’s a simple process that makes a big difference. Whether you want to keep your room dark or add an extra layer of style, a curtain liner is the solution. In this guide, we will walk you through the steps to put a liner on a curtain easily. Let’s get started!
Introduction To Curtain Liners
Curtain liners are an essential addition to any room. They add more than just beauty to your windows. A liner can enhance the functionality of your curtains in many ways. Whether you want to block light, add privacy, or insulate your room, a curtain liner can help. Understanding how to put a liner on a curtain can be a valuable skill for any homeowner.
Benefits Of Curtain Liners
There are several benefits to using curtain liners:
- Privacy: Liners add an extra layer of privacy to your room.
- Light Control: They help control the amount of light entering the room.
- Insulation: Liners can keep your room warmer in winter and cooler in summer.
- Protection: They protect your curtains from fading and damage.
- Noise Reduction: They help reduce outside noise.
Types Of Curtain Liners
There are different types of curtain liners available. Each type serves a specific purpose. Here are some common types:
| Type | Description | Best For |
|---|---|---|
| Thermal Liners | These liners provide insulation and help save energy. | Cold climates |
| Blackout Liners | They block out light completely. | Bedrooms and media rooms |
| Waterproof Liners | These are resistant to water and moisture. | Bathrooms and kitchens |
| Noise-Reducing Liners | They help muffle outside noise. | Busy streets or noisy neighborhoods |
Materials Needed
If you want to enhance your curtains, adding a liner can help. Liners can provide extra insulation and privacy. They can also protect your curtains from sun damage. Before you start, you need to gather all the necessary materials. Below are the key items you will need.
Tools And Supplies
First, let’s take a look at the tools and supplies you will need. Having everything ready will make the process smoother.
- Measuring tape: For accurate measurements of your curtains and liner.
- Fabric scissors: To cut the liner to the correct size.
- Sewing machine or needle and thread: For attaching the liner.
- Iron: To smooth out any wrinkles in the fabric.
- Pins: To hold the fabric in place while you sew.
- Fabric marker or chalk: For marking where you need to cut or sew.
- Seam ripper: In case you need to remove any stitches.
Choosing The Right Liner
The type of liner you choose is important. It depends on your needs and preferences. Here are some options:
| Type of Liner | Benefits |
|---|---|
| Thermal Liners | Keeps rooms warm in winter and cool in summer. |
| Blackout Liners | Blocks out light, ideal for bedrooms. |
| Privacy Liners | Offers privacy without blocking too much light. |
| Noise-reducing Liners | Helps to dampen outside noise. |
Make sure the liner is the same length as your curtain. It should also be slightly narrower to avoid bunching.
By choosing the right tools and liner, you can achieve a professional look. Your curtains will not only look better but also function better.
Measuring Your Curtains
Adding a liner to your curtains can enhance insulation and privacy. It also protects your curtains from sun damage. To get a perfect fit, you need to measure your curtains accurately. This step-by-step guide will help you measure your curtains for a liner.
Measuring Width
First, measure the width of the curtain rod. Use a steel tape measure for accuracy. Measure from one end to the other. Write down the measurement. This is the width you need for your liner.
If you have multiple panels, measure each panel separately. Add the widths together. This gives you the total width for the liner.
Measuring Length
Next, measure the length of your curtains. Start at the top of the curtain rod. Measure down to the bottom edge of the curtain. This gives you the length of your liner.
If your curtains have a hem, include it in your measurement. Write down the measurement. This ensures your liner fits well.
Remember to measure each panel separately if you have more than one. This ensures accuracy.
Preparing The Liner
Preparing the liner for your curtain ensures a perfect fit and a polished look. This step involves measuring, cutting, and hemming the edges. Taking the time to prepare the liner properly will help your curtain hang better and last longer.
Cutting To Size
First, lay the liner flat on a large surface. Measure the curtain’s width and length. Add an extra inch to each side for hemming. Mark these measurements on the liner using a fabric chalk. Use a sharp pair of scissors to cut along the marked lines. Ensure your cuts are straight and precise.
Hem The Edges
Fold the edges of the liner over by half an inch. Press the fold with an iron to create a crisp edge. Fold the edge over again by another half inch. Press again to secure the fold. Use straight pins to hold the fold in place. Sew along the edge with a sewing machine or by hand. Remove the pins as you sew to avoid breaking the needle.
Check the hem to ensure it is even and secure. Repeat the hemming process for all four edges of the liner. Your liner is now ready to be attached to your curtain.
Attaching The Liner
Attaching a liner to your curtain can enhance its functionality and look. Whether you want to block light, add insulation, or protect your curtains, attaching a liner is a simple task. Here, we will explore two methods for attaching a liner: using hooks and sewing the liner.
Using Hooks
Using hooks is a quick and easy way to attach a liner. This method is great if you want a non-permanent solution.
- First, lay your curtain and liner on a flat surface.
- Align the top edges of both the curtain and the liner.
- Attach curtain hooks to the top of the liner.
- Next, insert the hooks into the curtain’s top hem or rings.
- Ensure the liner hangs evenly behind the curtain.
- Adjust as needed for a smooth and even appearance.
Sewing The Liner
Sewing the liner offers a more permanent attachment. This method ensures the liner stays in place.
- First, lay the curtain and liner on a flat surface.
- Align the top edges of both the curtain and the liner.
- Pin the liner to the curtain, ensuring it is evenly attached.
- Use a sewing machine to sew the top edge of the liner to the curtain.
- Make sure to sew straight lines for a clean finish.
- Remove the pins and hang your curtain with the attached liner.
Both methods are effective for different needs. Using hooks is quick and adjustable, while sewing provides a secure and permanent solution. Choose the method that best suits your needs and enjoy the benefits of a lined curtain.
Hanging The Curtains
Once you have chosen the perfect liner for your curtains, the next step is to hang them properly. This ensures they look great and function well. Let’s dive into the key steps for hanging curtains with liners.
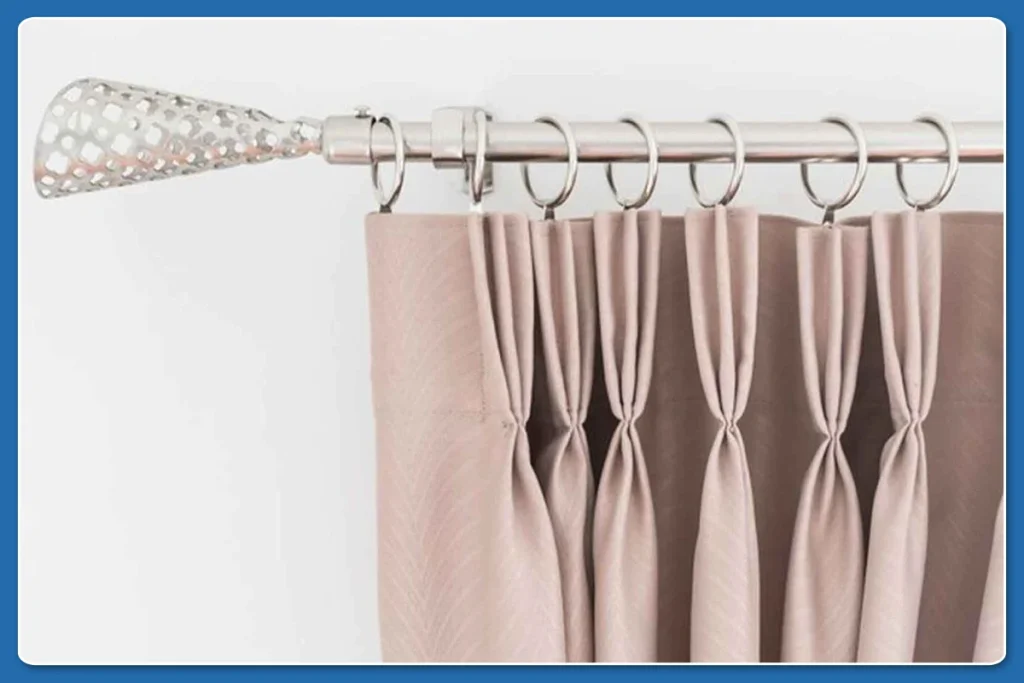
Choosing The Right Rod
First, select a sturdy and durable curtain rod. It should match your room’s décor. Measure the window’s width. Choose a rod that extends beyond the window frame. This allows the curtains to fully cover the window. Opt for rods that can support the weight of both curtains and liners.
Ensuring Proper Alignment
Aligning your curtains and liners is crucial for a neat look. Start by laying out the curtains and liners flat on a surface. Attach the liner to the curtain with hooks or clips. Make sure the liner is slightly shorter than the curtain. This prevents the liner from peeking out.
Hang the curtain and liner on the rod. Slide them to the center. Ensure the curtain falls evenly on both sides. Adjust the liner if needed. This step ensures your curtains look polished and professional.
Maintaining Your Curtain And Liner
Maintaining your curtain and liner ensures they last longer and look great. Regular upkeep helps keep them clean and fresh, enhancing your room’s overall appearance. Follow these simple steps to maintain your curtains and liners with ease.
Cleaning Tips
Regular cleaning is essential for your curtains and liners. Dust accumulates quickly and can affect their appearance. Shake out the dust every week. Use a vacuum cleaner with a soft brush attachment. This removes dust without damaging the fabric.
If your curtains are machine washable, follow the care label instructions. Use a gentle cycle and mild detergent. Avoid bleach as it can damage the fabric. For liners, check if they are machine washable or need hand washing.
Spot clean stains immediately with a mild soap solution. Blot the stain gently and avoid rubbing. It prevents the stain from spreading.
Storage Tips
Proper storage is crucial when not using your curtains and liners. Clean them thoroughly before storing. This prevents mold and mildew growth. Fold the curtains neatly to avoid wrinkles. Store them in a cool, dry place. Avoid direct sunlight to prevent fabric fading.
Use breathable fabric bags for storage. This allows air circulation and keeps the curtains fresh. Avoid plastic bags as they can trap moisture. It can lead to mold growth and fabric damage.
Hang liners to prevent creasing. If folding is necessary, do so gently. Store them with the curtains for easy access.
Troubleshooting Common Issues
Sometimes, putting a liner on a curtain can be tricky. Here are some common problems and how to solve them. From dealing with wrinkles to adjusting length, we’ve got you covered.
Wrinkles And Creases
Wrinkles and creases can make your curtains look unkempt. To fix this:
- Steam the curtains: Use a steamer to remove wrinkles. Hold it a few inches away from the fabric.
- Iron the liner: Place a cloth over the liner and iron on a low setting.
- Hang them: Sometimes, simply hanging the curtains will let gravity do its job.
Adjusting Length
The length of the liner is crucial for a neat look. Follow these steps:
- Measure: Measure the curtain and liner to ensure they match.
- Pin: Pin the liner to the curtain at the top.
- Trim: Trim any excess fabric at the bottom.
- Hem: Hem the bottom edge for a clean finish.
These simple steps will help you achieve a polished look. Proper measurement and trimming are key to success.
Frequently Asked Questions
What Is A Curtain Liner?
How Do You Attach A Curtain Liner?
Why Use A Curtain Liner?
Can I Add A Liner To Any Curtain?
Conclusion
Adding a liner to a curtain is simple and effective. It enhances privacy and improves insulation. Follow the steps outlined to ensure a perfect fit. Measure carefully, choose the right liner, and attach it securely. A well-lined curtain looks great and serves its purpose well.
Practice these tips to enjoy better curtains at home. Happy decorating!